
Creating a handmade candle can seem like an overwhelming task, especially if you’ve never tried it before. However, with a little patience, some basic supplies, and a willingness to experiment, you’ll find that making your own candles can be a rewarding and enjoyable hobby. 🕯️💫
There’s something magical about the warm glow of a handmade candle filling your space with fragrance and ambiance. Making your own candles not only allows for personalisation but also provides a creative and fulfilling craft. In this article, we’ll guide you through the step-by-step process of creating beautiful handmade candles that you can cherish or gift to your loved ones.
After reading this article, maybe you may start your business. How to Start Your Handmade Candle Business.
Suggested: Detox Tea: Benefits and Risks
Easy Techniques on How to Improve Memory
Materials Needed
- Wax: Choose a wax type based on your preferences; popular options include paraffin, soy, or beeswax.
- Wick: Select an appropriate wick size for your candle. Wicks come in various materials like cotton, wood, or hemp.
- Fragrance Oils (optional): Enhance your candles with your favorite scents.
- Dye (optional): Add color to your candles with candle dye or crayon shavings.
- Double Boiler or Microwave-Safe Container: For melting wax.
- Thermometer: To monitor wax temperature.
- Stirring Utensil: Wooden or metal for mixing in fragrance or dye.
- Container or Mold: Choose from jars, molds, or silicone containers for shaping your candles.
- Adhesive: To secure the wick in place (glue dots or hot glue work well).
- Pencil or Chopsticks: To hold the wick in place during pouring and cooling.
Step-by-Step Guide
- Prepare Your Workspace: Set up a clean and organized workspace. Cover surfaces to catch any potential wax spills.
- Secure the Wick: Attach the wick to the bottom center of your container using adhesive. Ensure it stands straight by wrapping it around a pencil or placing it between chopsticks.
- Melt the Wax: Using a double boiler or microwave, melt the wax. Monitor the temperature with a thermometer, aiming for the recommended melting point based on your chosen wax type.
- Add Fragrance and Color (Optional): If desired, mix in fragrance oils and dye when the wax is fully melted. Stir thoroughly to distribute color and scent evenly.
- Pour the Wax: Carefully pour the melted wax into your prepared container, leaving about half an inch from the top. Ensure the wick remains centered.
- Cooling and Setting: Allow the candle to cool and set completely. This process may take several hours, so be patient.
- Trim the Wick: Once the candle has cooled, trim the wick to your preferred length (usually about half an inch above the wax surface).
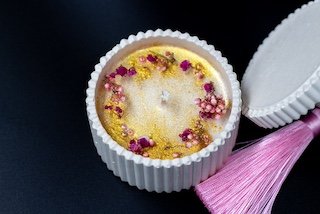
- Personalize Your Candle: Get creative! Decorate your candle jars with ribbons, labels, or any additional personal touches.
- Curing (Optional): For optimal scent throw, let your candle cure for a few days before burning.
- Enjoy Your Handmade Candle: Light your candle, and bask in the warm glow and delightful fragrance of your handmade creation.
Suggested: How To Boost Immune System
Royal Elegance: Look Like a Royal Princess
Safety Tips
- Always follow safety guidelines when working with hot wax and open flames.
- Keep a fire extinguisher nearby, and never leave melting wax unattended.
- Work in a well-ventilated area to disperse any fumes.
- Use caution when handling hot containers and melted wax.
Creating handmade candles is a rewarding and enjoyable process. Whether you make them for yourself or as thoughtful gifts, the experience of crafting your own candles adds a personal touch to any space. So, gather your materials, embrace your creativity, and let the soothing glow of handmade candles illuminate your surroundings.
Understanding the Basics of Candle Making
At the heart of candle making lies a straightforward process which consists of melting wax, introducing colour and scent, positioning a wick, and allowing the final product to solidify. On the surface, this process may appear uncomplicated, but the true artistry and creativity lie in the fine details and in how you tailor-make the process to suit your style and preference.
Candle crafting is more than just producing a source of light. It’s about shaping a sensory experience through the interplay of aroma, colour, and ambiance. Each step in the process provides an opportunity to personalise your creation, from choosing a unique fragrance and colour that reflect your personality or mood, to selecting a special container or mould that adds an aesthetic touch.
The art of candle making offers a platform to play with various elements, allowing you to exercise your imagination and creativity. With each candle you make, you get the opportunity to explore, experiment and perfect your craft. Whether you are aiming for a simple, elegant candle for your living room, or a bold, fragrant masterpiece for your workspace, understanding the basic process is your first step in the journey towards creating your own bespoke candle.
In the end, mastering the basics of candle making is not just about following a step-by-step process, but also about embracing the freedom to design, to experiment, and to create something truly unique and personal. The individual steps might be simple, but the possibilities they offer are boundless. With a bit of patience, and a dash of creativity, you can transform these basic steps into a fulfilling hobby or even a profitable venture.
Choosing the Right Supplies for Your Candle
Embarking on your candle-making journey begins with assembling the right kit. It’s essential to choose the correct materials to create a beautiful and effective candle. Here’s a list of the fundamentals you’ll need to get started.
First up, you’ll need wax. A popular choice for novices is soy wax, as it’s not only environmentally friendly but also user-friendly due to its low melting point and the ease with which it can be handled.
The next item on your list is a heat source. A cooker will do the job perfectly. This will be used to safely melt your wax using a double boiler technique.
Then, you’ll need a container or mould. This can range from a simple glass jar to an intricately designed mould depending on your personal style. Ensure it’s heat-resistant and aesthetically pleasing to ensure a successful final product.
Your candle wouldn’t be complete without a wick. There is an array of wick types available on the market, with cotton wicks being a common preference. The wick size will depend on the diameter of your container or mould.
Now for the creative part – choosing your colouring and fragrance. For the colouring, make sure to select a dye specifically made for candle-making. For fragrance, opt for an oil that is designed to be used in candles. This will ensure the aroma permeates the wax effectively, enhancing your candle’s scent.
To summarise, the basic supplies you’ll need include wax (preferably soy), a heat source, a container or mould, a wick, colouring (candle dye) and fragrance oil (for candle-making). Careful selection of these items will set you on the right path to crafting your first handmade candle.
How to Melt Wax Safely for Your Candle
The process of melting wax forms a fundamental part of candle-making and it is essential to proceed with caution in this stage. One of the safest ways to melt your wax is by using a double boiler system. If a double boiler isn’t readily available, you can replicate its function using two pots – one larger and one smaller, or even a heatproof bowl.
To start with, place a few inches of water into the larger pot. Then, put your selected wax into the smaller pot or the heatproof bowl. Place the smaller vessel inside the larger pot, creating a safe space for the wax to melt without coming into direct contact with the heat source.
Switch your cooker on, adjusting the heat to bring the water to a simmer. The rising steam from the simmering water will gently heat the smaller pot or bowl, melting the wax within it. It’s crucial to monitor the process closely to ensure the wax doesn’t get too hot. Overheated wax can lead to accidents, so never leave it unattended.
Remember, safety first: Always use a heat-resistant glove or oven mitt to handle the pots, especially when removing the smaller pot or bowl from inside the larger one. Ensure the wax is fully melted and no lumps remain before you proceed to the next step of adding your chosen fragrance and colouring.
By following these guidelines, you can safely and efficiently melt your wax, setting the stage for your candle-making journey.
Adding Fragrance and Colour to Your Candle
With your wax completely melted, you can now move on to infusing it with colour and scent. Begin by introducing a small quantity of your chosen candle dye. Stir the mixture gently and steadily until you achieve the colour intensity you desire. Remember, it’s easier to add more dye than to remove it, so it’s advisable to start with less and increase gradually.
Next, it’s time to introduce your selected fragrance oil. A good starting point is to incorporate about 1 oz. of fragrance oil for every pound of wax. However, this amount can be adjusted based on how strongly scented you want your candle to be.
Do remember to stir the mixture thoroughly after adding each element. This ensures that the colour and fragrance are evenly distributed throughout the wax. A well-mixed candle will burn uniformly, releasing a steady stream of scent as it burns.
Adding colour and scent to your handmade candle allows you to create a truly customised product. The perfect hue and aroma can transform your creation from a mere light source into a personal statement, or a heartfelt gift for someone special. Through this step, you have the power to influence the ambience of a room and the mood of those within it.
Bear in mind that candle-making is as much a science as it is an art. The quantities of colour and scent you use will affect not only the look and smell of your candle but also how it burns. Always approach this step with patience and creativity, remembering to enjoy the journey of experimenting until you find the perfect balance for your handmade candle.
Setting the Wick and Pouring the Wax
With your wax suitably coloured and scented, you’re prepared to position your wick. Dip the bottom of your wick into the molten wax and place it in the centre of your chosen container. This helps secure the wick in place and ensures it remains upright during the pouring process.
Next, carefully pour the wax into your container or mould, making sure to leave a small gap at the top. This prevents the wax from overflowing and creating a mess when it’s time to light the candle.
Keeping your wick centred while the wax is setting is important for an even burn. To assist in this, you can utilise a wick holder or something as simple as a pencil. Just lay the pencil across the top of the container and wrap the loose end of the wick around it. This holds the wick in the middle of the candle, resulting in a beautiful, professional-looking finish once the wax cools and solidifies.
From here, you’ll want to allow your candle to cure. But remember, patience is key. Rushing this part could lead to imperfections in your candle. So, while you wait, why not start planning your next candle creation? With endless combinations of colours and fragrances, the possibilities are only limited by your imagination.
Letting Your Candle Cure for the Best Results
The wax has been poured and your candle has started to take shape, but your task isn’t finished yet. The next essential phase is the curing process. This stage is about giving your candle time to rest, enabling the wax and fragrance oil to fully amalgamate. Think of it as the final seasoning of your candle recipe, without which the overall outcome wouldn’t be as satisfying.
Reserve a cool, dry spot where your candle can sit undisturbed, out of direct sunlight. This quiet environment allows the candle to settle and the wax to harden undisturbed. Your creation needs a minimum of 24 hours to cure fully, but patience is a virtue here. Resist the temptation to rush this phase as haste could lead to a candle that burns poorly or doesn’t emit the desired fragrance strength.
Remember, candle making is a slow craft that demands time and patience. Therefore, instead of hurrying the process, take pleasure in the wait. Perhaps utilise this pause to envision your next candle project or even jot down what you’ve learnt from your first attempt. Letting your candle cure is all about allowing your work to reach its full potential. Trust the process, give it the time it deserves and your reward will be a beautifully scented, long-lasting handmade candle.
Enjoying Your Handmade Candle Safely
After patiently waiting for your candle to cure, it’s now time to bask in the glow of your handmade creation! However, it’s important to bear in mind some safety measures. Begin by trimming your wick to approximately 1/4 inch to prevent the emission of excessive smoke and enhance a clean burn.
When finding the perfect spot for your candle, ensure it’s placed on a surface that can withstand heat and it’s well away from any objects that could potentially catch fire. Likewise, keep your candle out of draughts as they can cause it to burn unevenly and create smoke.
Remember, a lit candle requires continuous supervision. Make sure you don’t leave the room or go to sleep while your candle is burning. This not only extends the life of your candle but also safeguards your home.
Crafting your own candles can be an incredibly fulfilling venture, blending science with artistry. Now that you’ve got the basics under your belt, there’s no better time to get started. Round up your materials, prepare your workspace, and kickstart your candle-making journey towards designing your very own personalised candle! 💫